How to purchase and install ProductionLink:
- You do need to have Avid Interplay Web Services installed somewhere in your network.
- Go to the Diaquest web store here.
- Browse the product line and features.
- Choose your product.
- Purchase ProductionLink for Scratch.
- After you purchase ProductionLink you will get a link to download the installer.
- Create an account.
You will need the account to check your order and add more later.
- You should download and run the installer. You can download PC or Mac or both.
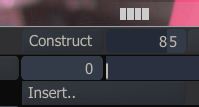
- Select a Node or "Add Single Output"

- Press the special play button to get into the Node.

- Press Insert
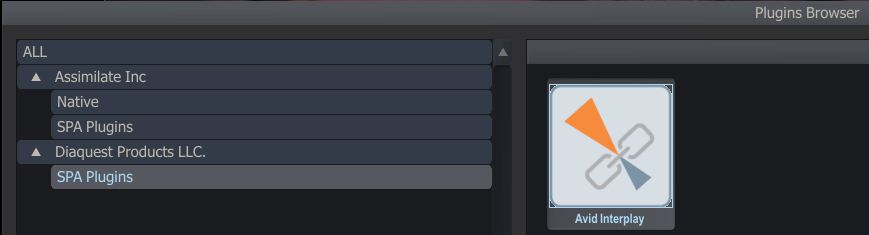
- Select the Diaquest ProductionLink SPA plug-in called Avid Interplay
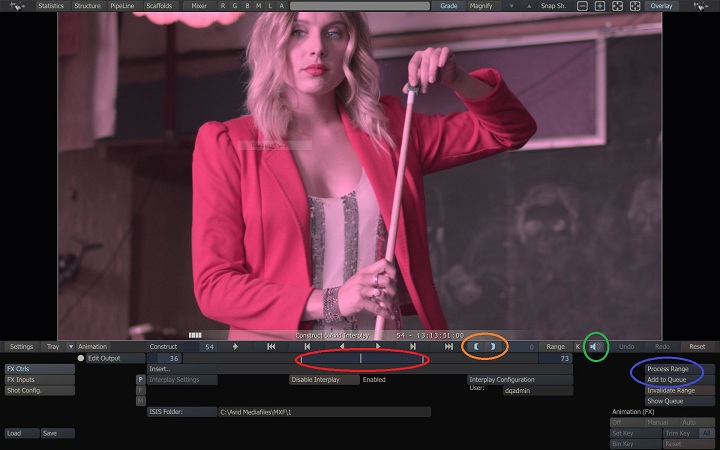
- For PC, Back in the Node press Interplay Configuration
For Mac set a range and then press "Process Range"
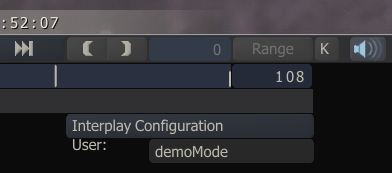
- You are in Demo mode (details at left link).
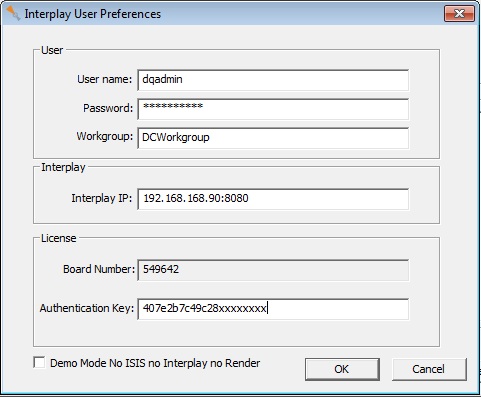
For PC you will see this after you press Preferences:
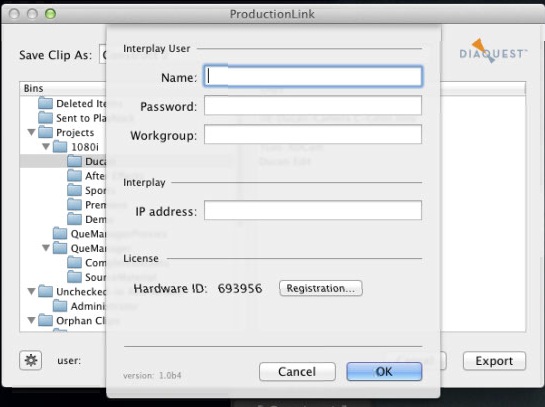
For Macintosh you will see this after you press the gear (lower left):
- If you are only using Demo Mode you can leave it checked and press OK as you are done.
- If for some reason you failed and simply get a render with errors you need to reset your node and afterward repeat the above steps.
Click here for instructions about how to reset your node.
- On the Mac press the gear button. On the PC press the Preferences button.
- In the Preferences dialog you will be presented with a "Board Number" or "Hardware ID".
- Log back in to your account at the Diaquest store.
- Check out a license using your board number.
- You will be given an Authentication Key.
- Go back into the Scratch Construct Node and
PC:
press "Interplay Configuration" on the PC
or on the Mac:
set a range and press "Process Range".
In the ProductionLink dialog press the gear (lower left).
- Enter that key in the license field in your Preferences dialog.
- Uncheck Demo Mode. (if checked)
- You must also enter your Interplay User Name, Password, Workgroup and Interplay IP.
- The Interplay IP should end with the port number separated by a colon.
- A typical Interplay IP is 192.168.168.90:8080
- You are now ready to use ProductionLink
Click here for a Walk Through outlining workflow.
- If for some reason you failed and simply get a render with errors you need to reset your node and repeat the above steps.
- Press Shot Config (lower left) to get the Shot Config settings.

- Verify your settings and make sure that you see Browse.
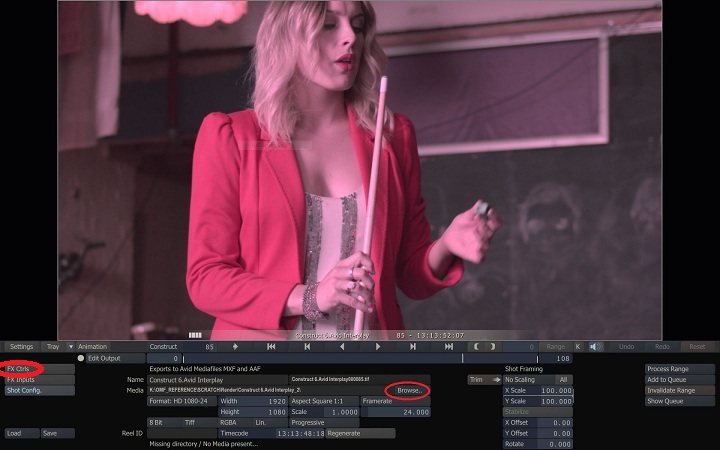
- If you see Bin All instead of Browse, then click Bin All and save and OK at right and OK.
- Now click FX Ctrls to get back to the Interplay buttons.
Click here for instructions on how to redo your authorization.